
| 일 | 월 | 화 | 수 | 목 | 금 | 토 |
|---|---|---|---|---|---|---|
| 1 | 2 | 3 | ||||
| 4 | 5 | 6 | 7 | 8 | 9 | 10 |
| 11 | 12 | 13 | 14 | 15 | 16 | 17 |
| 18 | 19 | 20 | 21 | 22 | 23 | 24 |
| 25 | 26 | 27 | 28 | 29 | 30 | 31 |
- ml
- AWS
- CT
- ubuntu
- FSL
- MySQL
- 동차좌표계
- Emoji
- https
- Anaconda
- 평가지표
- EC2
- relaxation time
- Cost Function
- procedure
- kernel
- object detection
- pm2
- Dual energy X-ray
- git
- ssl
- error
- Map-reduce
- x-ray
- MRI
- coursera
- Homogeneous Coordinates
- nodejs
- pytorch
- NRMSE
- Today
- Total
목록Code Snippet (4)
Pay it Forward
 [Python] raw file 열기 및 plot하기
메디컬 이미징을 다루다보면 raw 형식의 파일을 심심찮게 마주할 수 있습니다. 이 때, 아래와 같은 코드를 사용하여 raw 파일을 열고 plot 및 png형식으로 save할 수 있습니다. file = './raw_file.raw' img = np.fromfile(file,dtype='uint16', sep="") height = int(len(img)**0.5) width = int(len(img)**0.5) img = np.reshape(img, (height, width)) plt.imshow(img) plt.imsave('./raw2png.png', img) 주의해야 할 점은, 아래와 같이 raw file을 load하면 1차원의 배열로 받아지기 때문에 2차원의 이미지로 reshape해주어야 한다는 ..
 [Python] print '...' (생략) 없애기, 값 모두 출력하기
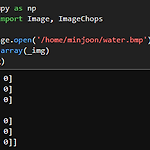
Python에서 image등을 load하여 값을 확인하고자 print할 때, 너무 많은 value를 띄우면 부하가 심하므로 아래와 같이 '...'로 값을 생략하여 보여주는 것을 확인할 수 있다. 이 때, 아래와 같은 코드를 통하여 출력값을 전부 print하도록 설정할 수 있다. np.set_printoptions(threshold=np.inf, linewidth=np.inf)
 [Python] figure plot 관련 snippets (figure 여러개 띄우기, grid 없애기)
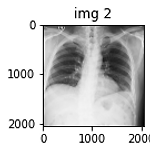
Figure 여러개 띄우기 import matplotlib.pyplot as plt fig = plt.figure() rows = 1; cols = 3 ax1 = fig.add_subplot(rows, cols, 1) ax1.set_title('img 1') ax1.imshow(img_1) ax2 = fig.add_subplot(rows, cols, 2) ax2.set_title('img 2') ax2.imshow(img_2) ax3 = fig.add_subplot(rows, cols, 3) ax3.set_title('img 3') ax3.imshow(img_3) fig.tight_layout() plt.show() Figure grid(눈금) 없애기 단일 figure인 경우 plt.xticks/ytic..
C++의 헤더에 포함된 sort() 함수의 Format은 다음과 같습니다 sort(/*정렬 시작 주소, 정렬 끝 주소, 정렬 시 사용하고자 하는 함수*/); 이 때, 정렬 시 사용하고자 하는 함수를 직접 만들 때 주로 사용하는 코드입니다. bool compare(const [type] & name1, const [type] & name2) { return (정렬하고자 하는 방식) } 아래는 User 라는 structure를 age 기준 오름차순으로 정렬하는 예시코드입니다. #include bool compare(struct User &a, struct User &b) { return a.age < b.age; } int main() { struct User a[10]; . . . sort(a, a + n..